Table of Contents
Essential Guide to Driveway Gate Installation
Driveway Gate Installation transforms your property by boosting security and curb appeal, especially for Brisbane homes. Whether manual or automated, these gates provide peace of mind and a stylish entrance. Pro Automatic Gates Brisbane specializes in custom solutions tailored for South East Queensland.
Installing driveway gates involves seven key steps: thorough site assessment and planning, preparing the foundation for stability on local slopes, assembling the gate frame with durable materials like steel or aluminum, installing hinges or tracks, integrating electrical systems for smooth operation, testing functionality, and final adjustments for safety. This process typically takes 1-3 days, ensuring compliance with Queensland standards and avoiding common pitfalls like uneven ground issues.
Benefits include enhanced protection against intruders and increased property value up to 5%. Driveway gates brisbane experts like Pro Automatic Gates handle automation with electric gate openers residential, adding convenience via remote access. Average automatic driveway gates cost ranges from $2,000 to $10,000, depending on features. DIY suits simple setups but professionals ensure safety and warranties, preventing costly errors.
Preparing for Your Driveway Gate Project
Starting your Driveway Gate Installation requires thorough preparation to ensure a smooth process, especially for Brisbane homes facing subtropical weather challenges like humidity affecting foundations. Begin with site assessment to evaluate driveway dimensions and slope, determining suitability for swing or sliding gates. Measure width, height, and clearance using a tape measure and level–aim for at least 10 feet of clear space for safe operation. Check for utility lines by calling Dial Before You Dig to avoid costly disruptions; this step is crucial in Queensland’s urban areas.
Next, develop a budget covering materials, labor, and automation. Automatic driveway gates cost typically ranges from $3,000 to $8,000 for residential systems, factoring in steel or aluminum fabrication, plus electric gate openers residential for remote access. Include extras like concrete footings suited to Brisbane’s soil. For accurate estimates, request a free quote from experts like Pro Automatic Gates, considering QBCC licensing for quality assurance.
Finally, secure permits through your local Brisbane council, as Queensland regulations mandate approval for structural changes. Weigh DIY versus professional installation–pros handle complex sites better. Here’s a quick checklist:
- Measure site accurately
- Budget for all components
- Verify utilities
- Apply for permits
- Consult QBCC-licensed installers
For inspiration on custom designs, explore the automatic gates gallery brisbane. Proper gate setup preparation and residential automation budgeting set the stage for seamless integration.
Planning and Designing Your Gate
Planning your driveway gate is the foundational step in Driveway Gate Installation, ensuring it meets your needs for security and style in Brisbane homes. Begin with these key instructions:
- Select gate style: Opt for swing gates if space allows easy access, or sliding gates brisbane for compact driveways with limited swing room.
- Choose materials: Prioritize durable options like steel for strength or Colorbond for weather-resistant Brisbane gate styles, influencing automatic driveway gates cost.
- Decide on automation: Integrate electric gate openers residential like remote controls for convenience.
- Sketch the design: Plan for a width of 10-20 feet, incorporating custom gate design elements tailored to your property.
This design phase matters because it directly impacts home security and property value, creating a seamless blend of functionality and curb appeal.
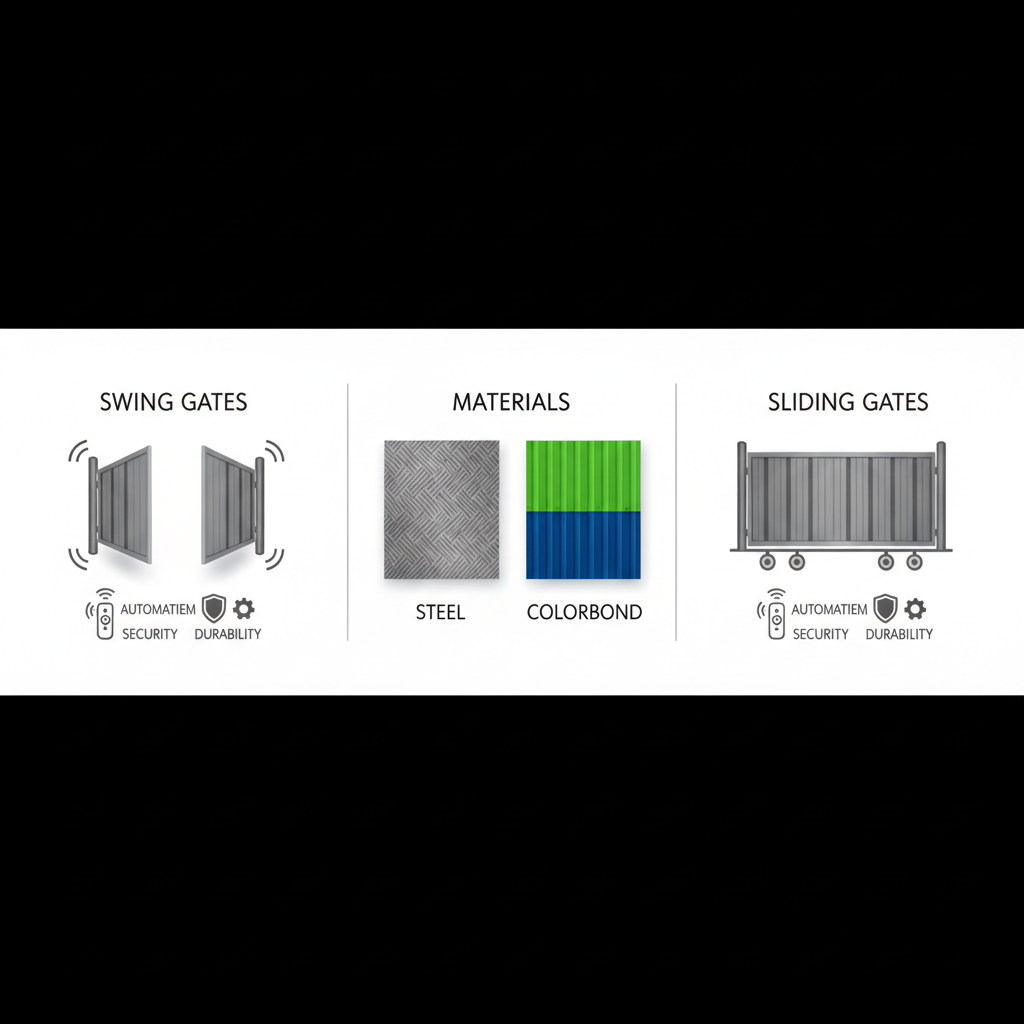
Driveway gate design options with materials and automation features
Tips include measuring your driveway twice to avoid undersizing for vehicle clearance, and considering future-proof automation to enhance usability without added costs later.
Gathering Materials and Tools
With your driveway gate design finalized, gathering the right materials and tools is crucial for smooth Driveway Gate Installation. This step ensures you have everything needed for a durable setup, whether DIY or with professional help in Brisbane.
Essential Materials and Tools
- Gate panels: One or two sturdy panels, such as colorbond electric gates brisbane for low-maintenance durability (quantity: as per design width).
- Posts: Two galvanized steel posts, 10-12 feet long for stability.
- Hinges and latches: High-quality gate hardware essentials, including heavy-duty hinges (4-6 per gate) and secure latches.
- Concrete mix: 4-6 bags (80 lbs each) for setting posts securely.
- Automation kit: If opting for automatic driveway gates, budget around $1,500-$3,000 for automatic driveway gates cost, including motors and remotes; consider electric gate openers residential from local suppliers.
Tools include a post hole digger, bubble level, string line, and welder for custom adjustments. As recommended in standard installation guides, these prevent common errors like uneven posts.
Quality materials matter for safety and longevity, reducing risks of sagging or failure. Source from Brisbane stores like Bunnings for eco-friendly options such as recycled steel.
Tip: Rent specialized tools like welders to save costs, and check warranties on hardware for peace of mind before proceeding to site preparation.
Site Preparation and Foundation Work
Before installing your driveway gate, thorough site preparation ensures a stable and durable foundation. Begin by clearing debris, vegetation, and obstacles from the area to create a clean workspace. This step is crucial for smooth Driveway Gate Installation and prevents future operational issues.
Mark the post locations precisely, considering side access integration like pedestrian gates brisbane for pedestrian pathways. Use stakes and string to outline the gate swing or slide path, ensuring ample clearance. Next, check for underground utilities by calling local services to avoid hazards.
Dig post holes 2-3 feet deep, or deeper in Brisbane’s clay-heavy soils to account for shifting. For setups with electric gate openers residential, reinforce foundations to support added weight and automation stress, as recommended in standard guides. Pour concrete into the holes, adding gravel at the base for drainage, and level the ground thoroughly. Allow concrete to cure fully before proceeding to post installation.
Proper preparation prevents gate shifting or misalignment over time, especially in variable Queensland weather. Avoid rushing; this phase safeguards long-term performance and safety.
Installing the Gate Posts
Once the foundation is prepared, installing the gate posts is a critical step in Driveway Gate Installation to ensure long-term stability, especially in Queensland’s variable weather. Begin by recommending galvanized steel posts for corrosion resistance against humidity and salt air.
Follow these post setting techniques for secure placement:
- Dig holes to the required depth, typically 1/3 of the post height, and pour wet concrete around the posts.
- Use temporary braces to hold posts plumb and level; check alignment with a spirit level.
- For swing gates, space posts about 4 inches wider than the gate width; for sliding gates brisbane, position the rear post to accommodate track and roller hardware.
- Allow 24-48 hours for concrete to cure before removing braces.
For heavy gates, secure posts further with metal brackets embedded in the concrete.
This alignment ensures even gate swing and prevents sagging over time, vital for smooth operation and safety amid Queensland’s wind loads. Proper leveling avoids costly adjustments later.
Tips: Employ temporary supports like wooden stakes to maintain square during curing, and double-check plumb in multiple directions. With posts set firmly, you’re ready to hang the gate frame next.
Assembling and Hanging the Gate
With the gate posts securely in place, the next phase of Driveway Gate Installation involves assembling the gate frame and mounting it for smooth operation. Begin by constructing the panels according to your design specifications, connecting frames with provided hardware. Attach hinges for swing gates or rollers for sliding models, ensuring they are aligned properly. For hinge installation, tighten bolts to recommended torque specs of 20-30 ft-lbs to prevent loosening over time.
Lift the assembled gate with a partner to avoid injury, positioning it onto the posts. Secure the hinges or track firmly, then adjust the gate for 1-2 inches of ground clearance to allow free movement. Test the manual swing or slide to confirm even operation without binding.
Proper assembly and hanging directly impact the gate’s longevity and functionality, ensuring it withstands daily use and weather exposure while maintaining security.
For safety, always work with a helper during lifting and verify compliance with local building codes. Lubricate moving parts like hinges before testing, and consider scalable techniques for heavier residential gates similar to commercial gates brisbane setups to handle added weight effectively.
Installing the Electric Gate Opener
After securely hanging your manual gate, integrating an electric gate opener elevates your Driveway Gate Installation to automated convenience, especially for residential setups. Electric gate openers residential options, such as sliding or swing models, use motors to glide gates open via remote signals, answering how they work and types available for various driveway designs.
Mount the opener motor firmly on the gate post or frame using provided brackets, ensuring alignment for smooth operation. Wire the unit to a dedicated power source, prioritizing electrical safety–consult a licensed electrician to avoid hazards. Install remote or keypad controls near the entry for easy access, then connect safety sensors at the gate’s base to prevent accidents; as per standard guidelines, these infrared beams must detect obstacles within 6 inches to reverse motion automatically. Finally, program settings like open/close times via the control panel.

Step-by-step installation process for electric gate opener
This automation enhances daily convenience by eliminating manual effort, boosting security for homeowners, and potentially impacting automatic driveway gates cost through efficient operation. For DIY feasibility, yes, but complex wiring demands professionals like pro automatic gates brisbane to ensure compliance and reliability. Follow the manufacturer manual closely, test sensors thoroughly before use, and verify remote functionality for seamless integration.
Testing and Final Adjustments
After completing your Driveway Gate Installation, thorough testing ensures everything operates smoothly and securely. Begin by manually operating the gate to check swing or slide motion for any binding or unusual noises. Next, test the automation by activating the remote or control panel, verifying that electric gate openers residential respond promptly and close fully.
Adjust alignment if the gate binds at any point, and fine-tune speed settings for optimal performance. Inspect for gaps along the perimeter to prevent unauthorized access, and tighten all hardware connections. Also test any pedestrian access points; if you have a separate side gate, ensure pedestrian gates brisbane operate correctly, latch securely, and integrate with the main opener if connected. In Brisbane’s humid climate, humidity can cause slight expansions in materials like timber or steel, so recheck alignments seasonally to avoid sticking..
Final Checklist
- Confirm smooth motion without obstructions.
- Test opener sensors and auto-reverse function.
- Verify secure latching and no large gaps.
- Document all adjustments for future reference.
This verification prevents malfunctions that could compromise security or convenience, saving costly repairs down the line. Schedule annual maintenance to keep your gate reliable. If issues arise during testing, refer to troubleshooting guides for quick fixes.
Common Issues and Solutions in Gate Installation
Even with careful planning in Driveway Gate Installation, homeowners in Brisbane often encounter hurdles that can compromise functionality and safety. These problems range from mechanical misalignments to electrical glitches, especially in automated systems. Understanding these common issues helps DIY enthusiasts and professionals alike prevent costly repairs, where automatic driveway gates cost can escalate quickly if not addressed early. Drawing from industry insights, failure rates for gate installations hover around 20-30% due to overlooked details like soil conditions in Queensland’s variable climate.
Here are five frequent issues and their solutions:
- Misalignment causing sticking: Gates may bind or scrape during operation if tracks or hinges shift post-installation, common in uneven Brisbane terrain. Solution: Realign by loosening bolts, adjusting levels with shims, and tightening securely; for persistent cases, consult experts to avoid further structural damage.
- Electrical faults in openers: Electric gate openers residential can fail from loose wiring or power surges, halting automation. Solution: Perform basic wiring checks with a multimeter and reset the system; always prioritize professional intervention for electrical work to ensure compliance with safety standards.
- Foundation settling: Over time, concrete bases sink due to expansive clay soils in South East Queensland, leading to gate instability. Solution: Reinforce with additional footings or gravel backfill during initial setup; monitor and adjust annually to maintain level operation.
- Automation programming errors: Remote controls or sensors misfire after setup, frustrating daily use. Solution: Reset the control panel to factory defaults and reprogram step-by-step per manufacturer guidelines; if issues persist, seek pro automatic gates brisbane for advanced diagnostics.
- Weather-related corrosion: Brisbane’s humid, salty air accelerates rust on metal gates, weakening frames. Solution: Apply protective coatings like galvanized zinc or marine-grade paint immediately after installation; regular inspections prevent escalation.
To minimize these pitfalls, incorporate preventive measures such as termite barriers in foundations for Queensland’s pest-prone environment and schedule annual maintenance. Encouraging professional help for complex electrical or automation tasks ensures longevity and safety, turning potential headaches into seamless functionality.
Completing Your Driveway Gate Project
Wrapping up your driveway gate project means reflecting on the journey from initial preparation to final installation. Key steps in driveway gate installation include site assessment, foundation pouring, gate assembly, and basic troubleshooting for smooth operation. By handling DIY prep work like clearing the area and measuring precisely, homeowners can save $500 to $2,000 on automatic driveway gates cost, making the process more affordable without compromising quality.
The benefits extend far beyond the install, enhancing home security and curb appeal while ensuring reliable access. Proper long-term maintenance, such as regular lubrication and inspections, promotes longevity–gates can last 20-30 years with care, as supported by expert installation tips. Investing in electric gate openers residential adds convenience, reducing manual effort and boosting property value.
Looking ahead, consider partnering with professionals for automation and custom designs. Contact Pro Automatic Gates Brisbane today for a free quote to bring your vision to life with expert support and peace of mind.